
In recent years, solar power systems have become increasingly popular, and many households have already installed them. Not that everyone is just following the trend—it’s more about energy independence. But once you’ve been using one for a while, you’ll notice that during the day, your panels generate more than enough power for your home, sometimes even leaving surplus. Come nighttime, though, that’s a different story—you still need to draw from the grid. And if a sudden outage hits, a standalone solar setup doesn’t really qualify as true energy independence either.
Over time, you realize that while you are saving on electricity bills and gaining some autonomy, it still doesn’t feel quite sufficient. So you start thinking—instead of buying a whole new system, adding a battery might be a more cost-effective and convenient option.
Can You Add a Battery to Existing Solar Panels?
Generally speaking, over 90% of solar systems on the market are theoretically capable of having a battery added. As we know, the electricity generated directly by solar panels is DC (direct current), while the electricity used by household appliances and supplied by the grid is AC (alternating current). The inverter is the device that converts DC into AC for appliances to use or for feeding back into the grid—and this inverter is the key to whether you can add a battery.
That’s because it determines energy flow direction (unidirectional vs. bidirectional), voltage matching (DC bus voltage range), and communication/control (BMS protocol). Adding a battery means the system needs to support bidirectional power flow—that is, DC needs to be converted to AC for discharge, and AC needs to be converted back to DC for charging. The inverter also needs to regulate the wide voltage range from the solar panels down to a fixed voltage platform for the battery, and it must communicate in real time with the Battery Management System (BMS) to control charging and discharging parameters properly.
- If the inverter you originally installed is already a hybrid inverter, that means it supports battery addition—you can just plug it in directly. This type of device already integrates PV control, battery charge/discharge conversion, and grid-tied power generation modules internally, and it comes with a pre‑wired battery interface. So you can simply connect it, let the communication protocols match up, and you’re done—no need for complicated retrofitting.
- If your home has a pure grid-tied inverter, there are still ways to add a battery, though it may be a bit more involved.
The first approach is AC coupling. That means leaving your existing inverter in place and adding a bi‑directional storage converter (PCS) alongside it, connecting the battery to this new device. In this setup, the solar power is first converted to AC, then fed back through the storage inverter to become DC again for battery charging. This method is the easiest to implement, but because the electricity goes through two conversion steps, efficiency is slightly lower and there’s more energy loss.
The second approach is to remove the old inverter and replace it with a brand‑new hybrid inverter. This eliminates the back‑and‑forth conversion losses and delivers the highest efficiency, but it requires rewiring and you’ll have to dispose of the old unit—cost and time will both be higher.
- Finally, there’s the microinverter case. These typically have a small inverter attached to each panel, so they output AC directly and can’t connect a DC battery directly. To add storage, you usually have to use the same brand’s proprietary storage system, or connect a general‑purpose storage device at the AC combiner point—but this places very high demands on communication protocol matching, and it’s not something you can easily get right without careful planning.
When does it actually make sense to add a battery?
Installing solar panels helps you save on electricity bills and achieve a degree of energy self‑sufficiency, but it still has limitations. Adding a battery solves the mismatch between sunlight hours and your usage hours, allowing your solar system to deliver maximum value.
1. You Want Backup Power During Power Outages
When a sudden outage hits, you might assume that with solar panels on your roof, you can keep using electricity as usual—but in reality, that’s often not the case. If you have a standard grid‑tied system, an outage triggers anti‑islanding protection. When the grid goes down due to storms, earthquakes, or equipment failures, the PV system must shut down within milliseconds and is strictly prohibited from exporting power. This protection is well‑intentioned—it’s designed to keep repair workers safe while they’re inspecting and fixing lines. But the consequence is that when everyone else loses power, so do you—your solar panels become effectively useless at that moment.
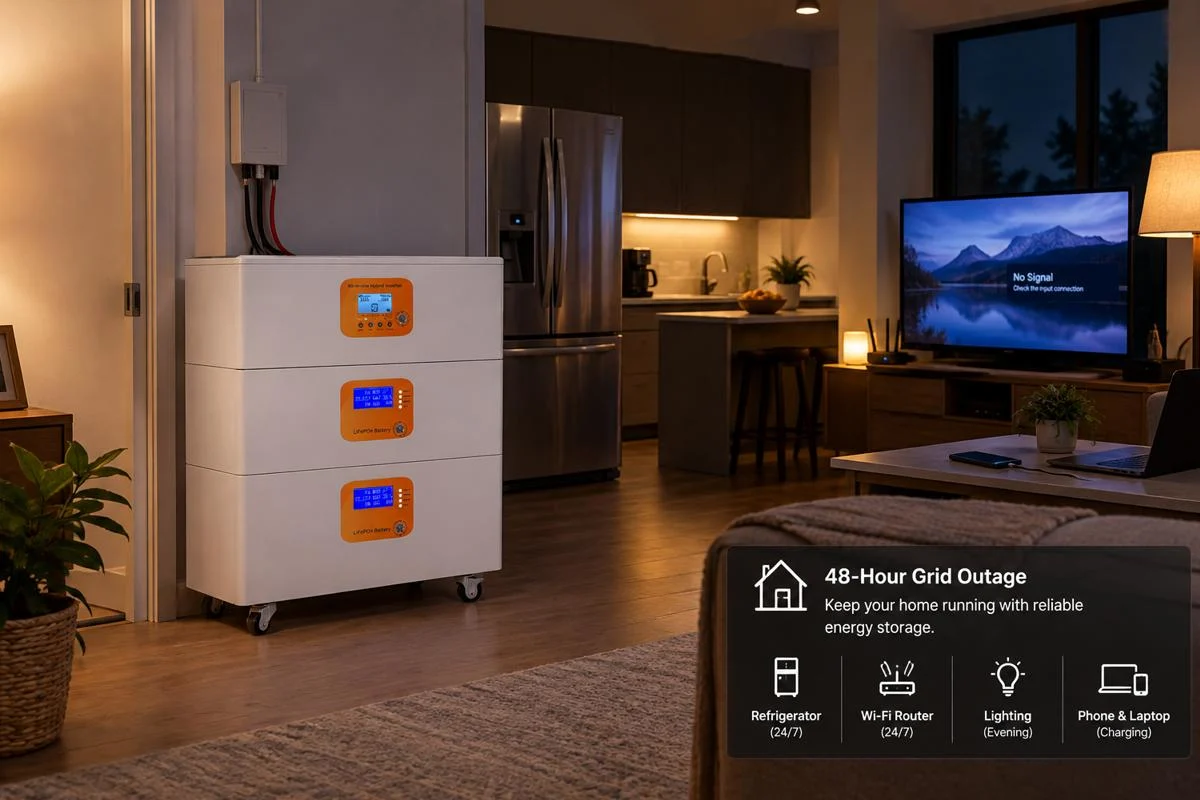
However, if you add a battery, your solar system becomes complete and gains off‑grid backup capability. Then, in the event of another outage, the system will seamlessly take over within milliseconds, keeping your refrigerator, Wi‑Fi router, essential lighting, and other critical devices running normally.
2. Your power company changed the rules
Back in the early days, during the NEM 1.0 era, every extra kilowatt‑hour you sent to the grid during the day got you 100% retail‑value credit, and there was no mandatory time‑of‑use (TOU) pricing. So whether you sold electricity at noon or used it at 8 p.m., each kWh had exactly the same value. In the NEM 2.0 era, you still received full retail credit for every kWh exported—so customers didn’t really need batteries, and payback periods were short. TOU pricing was introduced, making evening power more expensive, but since daytime exports also earned retail rates, even with some network charges factored in, the overall deal was still very favorable.
But with NEM 3.0, a lot has changed. The excess power your roof generates is no longer credited at a 1:1 retail rate—instead, it’s discounted by about 80%, with utilities offering only a few cents per kWh at wholesale prices. Then at night, when you actually need power, you still have to pay higher rates to buy it from the grid. As a result, payback periods stretch out to ten years or more, and the cost‑effectiveness takes a nosedive. At this point, a battery may become a necessity.
To break out of this unfavorable situation, adding a battery is the way to go—so you can achieve energy self‑sufficiency. During the day, store your excess solar power in your own battery, and in the evening peak‑rate hours, when electricity is most expensive, draw from the battery instead of the grid.
3. Your Solar System Generates More Power Than You Use
The key point is that solar generation peaks during the daytime, when you may be out at work or don’t need much power because it’s bright enough. Without a battery, any surplus has to be sold back to the grid at a low price. Then, in the evening peak, you have to buy power back from the grid. To eliminate this time‑gap between generation and consumption, adding a battery lets you store every extra kilowatt‑hour from the day and use it at night or on cloudy days. This significantly boosts your self‑consumption rate and turns your PV system into a truly self‑sustaining energy loop.
How Many Batteries Can You Add And Can You Expand Later?
So if you’re going to add a battery, what size do you need? And if the capacity you start with isn’t enough, can you stack on more later? These are important questions, but they’re not hard to answer—they all depend on your household’s power usage.
How to Determine the Number of Batteries You Need
To figure out how big a battery you need, you can roughly work it out in three simple steps:
1. Define the core purpose of adding the battery
If you just want the solar system as an emergency backup, you only need to keep the refrigerator, lighting, router, phone chargers, and other basic devices running.
If you want to rely on battery power through the evening, you’ll need a battery that can support all your household appliances—including high‑draw items like air conditioners, refrigerators, dryers, and so on.
If your goal is to profit from time‑of‑use arbitrage, then you charge during the day when solar is abundant or grid rates are low, and discharge during peak‑rate periods for home use.
2. Calculate your daily energy consumption during the target period
Battery capacity needed (kWh) = [Total power of target devices (kW) × Expected backup duration (hours)] ÷ Battery depth of discharge (DoD standard 0.9)
You can check your utility bills to find your total monthly consumption, then divide by the number of days to get average daily usage. For winter and summer, it’s better to average across several bills to improve accuracy.
| Use Case | Who It’s For | Rough Calculation | Recommended Battery Capacity |
| Outage backup | After sunset, you only need the fridge to stay cold, a few lights on, router and phone charging—total about 0.25 kW. | These essentials running for 12 hours consume about 3.3 kWh. | Go with a 5 kWh battery pack—best value for money, enough for emergencies without waste. |
| Evening routine | Dinner, TV, hair drying, basic appliances running, but you avoid highpower heating or AC where possible. | Basic appliances ~4.8 kWh over 12 hours, plus intermittent cooking and hair dryer ~2.5 kWh—total about 7.3 kWh for the night. | Recommend 10 kWh—after accounting for losses, it’ll get you through till morning without pinching. |
| Fullhome comfort | Running 12 bedroom AC units at night, plus everything else as usual. | Base usage (7.3 kWh) + one 1.5ton inverter AC for 8 hours (~4.8 kWh) + a little extra margin—nighttime total around 15 kWh. | Suggest 1520 kWh, typically 34 stacked 5 kWh battery modules for flexible configuration. |
3. Consider your solar system’s output and depth of discharge
After all those considerations, don’t forget to account for your solar system’s actual output and the battery type you choose—this prevents buying a battery that never fully charges, or one that claims a certain capacity but can’t deliver all of it in practice.
Generally, even a battery labeled 10 kWh cannot deliver a full 10 kWh. To protect battery life, the system usually sets a safety floor, keeping 10%–20% of charge unused. So if your calculated usage comes out to exactly 10 kWh, don’t buy a 10 kWh nominal battery—add a bit extra to cover losses, which gives you a safer margin.
Also, solar systems typically supply power to your home first, and only surplus energy goes into the battery. So you need to first figure out how much your daytime household devices will consume, then decide on capacity—otherwise you might end up oversizing and wasting money.
Example: Suppose you have a 5 kW PV system, with about 4 effective sun hours per day locally.
Total daily generation: 5 kW × 4 h = 20 kWh
Daytime self‑consumption: assume 12 kWh
Surplus available for battery: 20 − 12 = 8 kWh
That means you can only charge the battery with up to 8 kWh per day. If you blindly buy a 15 kWh battery, it’ll only get half‑filled each day—the extra capacity is never used, and you’ve wasted money. So plan ahead.
The Modern Solution: Flexible & Modular Expansion
What if, after your first battery installation, you didn’t plan well and the capacity isn’t enough? Does that mean you have to start over? Not at all—you can consider stacking additional batteries on top of the existing ones. But you need to understand the expansion mechanisms and limitations first.
Most modern residential storage systems on the market—like Tesla Powerwall, Enphase IQ Battery, and various stackable or wall‑mounted LFP battery packs—are designed with modularity in mind. If you start with a 5 kWh or 10 kWh master module, you can typically add more expansion battery packs of the same specifications later on.
However, there are a few things to watch out for:
1. Inverter power limit
Adding battery capacity increases total stored energy, but the maximum output power is limited by the inverter. If you later want to run more high‑power appliances simultaneously, you’ll need to verify whether your current inverter is sufficient, or consider upgrading to a hybrid inverter that supports parallel operation.
2. Mixing old and new batteries, and BMS matching
Try not to connect new and old batteries directly in parallel if they have a large age gap. Aged batteries have higher internal resistance, and mixing them creates a “bucket effect”—overall performance will be dragged down by the weakest unit. If you plan to expand later, aim to add modules within 1–3 years.
3. Brand and protocol compatibility
Most battery systems require expansion modules to be from the same brand, same model, or at least using the same communication protocol. Batteries from different brands typically cannot work together under a single BMS, and mixing them carries high risks.
4. Reserve installation space and wiring
If you already have the idea of adding a battery when you first install your solar system, let your installer know ahead of time. That way, they can leave room in the distribution panel, breaker specifications, cable cross‑section, and wall/floor space—saving you a lot of time and rework costs later.
Full-Home Retrofit vs. Micro-Retrofit: A Smarter Alternative
After reading all the above about how to add a battery and what to consider, you might be thinking—wow, that’s a lot of hassle, how long is all this going to take? But actually, that’s just you thinking along the lines of older installation methods. Today’s home storage technology has evolved considerably—it doesn’t have to be that complicated anymore.
The Traditional Approach: Expensive Full-Home Retrofit
The traditional split‑system retrofit is indeed a pain. It requires mounting a bulky storage inverter separately on the wall, with several battery packs hanging next to it—lots of screws all over the wall, cables running every which way, taking up valuable garage or wall space and looking messy. Plus, with separate components, the installer has to tear open your main distribution panel, run dedicated lines, and set up a critical‑load sub‑panel—labor costs alone can run into thousands of dollars. And large‑scale electrical modifications like this require submitting complex building and electrical permit applications to local authorities, waiting for approvals, scheduling inspections—you’re looking at two to three months of hassle at minimum.
The Innovation: Low-Barrier Micro-Retrofit System
But now, technology across the board has improved, and you don’t have to go through all that trouble anymore.
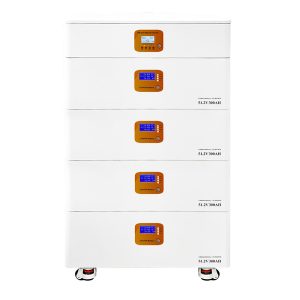
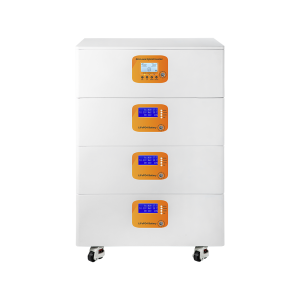
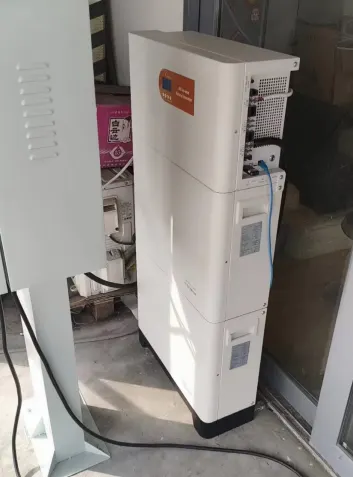
There’s now a smarter approach on the market called a lightweight micro‑retrofit. It uses a highly integrated, modular stackable all‑in‑one unit that combines the inverter and battery into a single package. To add more battery capacity, you just stack modules on top of each other like building blocks.
No need for specialized drilling or extensive wiring—just place the unit on the floor, click the battery module on top, and plug in the connectors. The whole device takes up less space than a small refrigerator. And it doesn’t require major modifications to your existing electrical setup, because the unit already integrates the inverter, BMS, and control modules internally—saving you a significant chunk of labor costs. The core advantage of this integrated stackable design is its modular, expandable architecture, so you can choose the battery size that matches your actual home usage. If you want to give it a try, start with just one 5 kWh layer. If later you find it’s not enough, simply buy another layer and stack it on.