Have you gotten your own off-grid cabin, only to ask the power company to supply electricity, only for them to quote you a ridiculous $20,000 to $100,000+ just to extend power lines a few hundred feet to a few miles?
If you don’t want to use the local power company’s electricity for your off-grid cabin, check out these 6 off-grid power solutions.
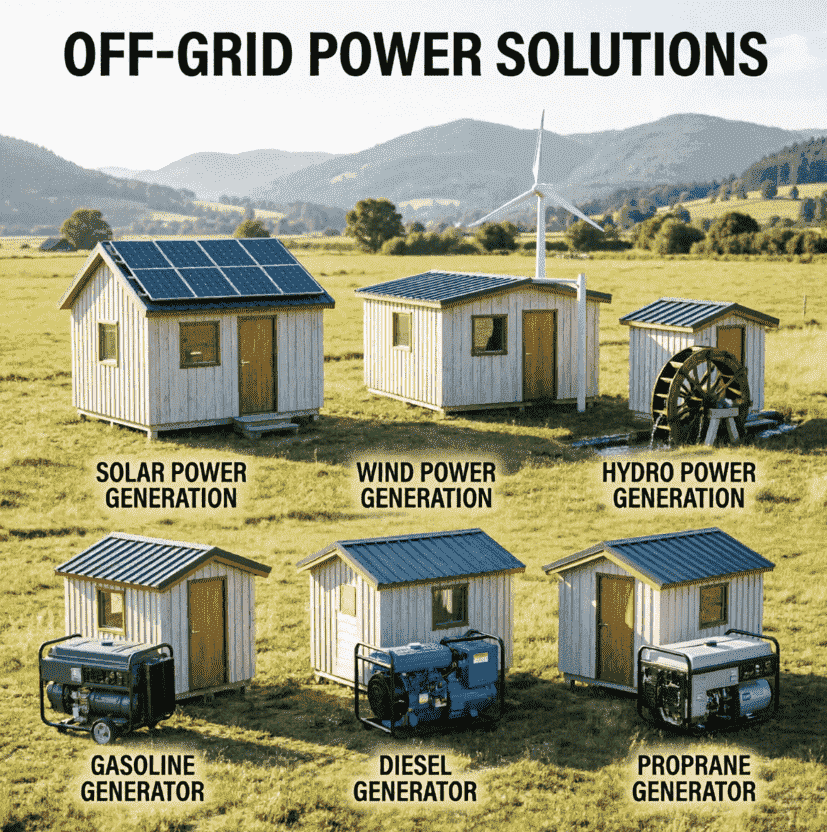
6 Ways to Power an Off-Grid Cabin
Solar Power
Use solar panels to convert sunlight into DC power. Its advantage is that it requires almost no maintenance, and the scale can be flexibly configured from a few hundred watts to several kilowatts. The disadvantage is that power generation depends on the weather.
My advice: This is definitely the top choice for off-grid power.
Wind Power
Wind power uses a wind turbine to drive a generator. Its advantage is that it can generate power day or night, complementing solar power. The disadvantage is that it requires stable wind resources. If your cabin is in a densely forested area, you’ll need to mount the wind turbine on a tall tower for it to work properly.
I checked different wind turbines on Amazon. A basic wind turbine costs at least $1,000+.
My advice: Wind power is suitable for windy areas and coastlines.
Hydroelectric Power
Hydroelectric power uses the drop of a nearby stream to let water flow drive a turbine. Its advantage is that it can provide stable power 24/7. The disadvantage is that you need a year-round stream with sufficient drop where you live. You also need to ensure the water doesn’t freeze in winter.
Although I have a stream where I live, the flow is clearly too slow to support power generation.
My advice: If you have a river or stream with enough drop near your home, consider installing a water turbine.
Gasoline Generator
Inexpensive, available everywhere, and easy to start. Disadvantages are loud noise, high fuel consumption, short gasoline shelf life, and long-term storage tends to clog the carburetor.
My advice: Suitable for occasional emergency use.
Diesel Generator
Compression-ignition engine running on diesel. Its advantages are greater durability than gasoline engines, better fuel economy, ability to run high-power machines, and long lifespan. The obvious disadvantage is that it’s heavy.
Checking prices on Amazon, a diesel generator costs between $800-$5,000.
My advice: If you need to run for long periods and your cabin has very high power demand, consider keeping one as a backup.
Propane Generator
Uses propane as fuel, stored in tanks. Its advantage is that propane can be stored indefinitely without going bad like gasoline. It burns clean, is easier to maintain, and can share fuel with wood stoves and water heaters. The disadvantage is that one tank may not last very long, requiring many propane tanks.
Amazon also sells generators that run on gasoline, propane, and natural gas, generally priced above $1,000.
My advice: Can serve as a backup for a solar system.
How to Build an Off-Grid Cabin Solar System – Case Studies
I’ve gathered some solutions from homeowners on social media. Let’s look at how they built their off-grid solar systems, solved water supply, and kept warm.
User 1:
Located in the coastal mountains of central California (elevation ~427 meters), with abundant summer sun and a mix of dry cold and rain/snow in winter. The system design accounts for seasonal temperature differences and light changes to achieve year-round self-sufficiency. After a wildfire destroyed their previous home, they decided to rebuild a 1,350 sq ft cabin and go off-grid.
Solar panels: 18 x 360-watt panels (6,480 watts total), south-facing, ensuring abundant summer generation and basic winter power.
Energy storage: 48V 20 kWh battery bank (two sets of 4 x 12V 200Ah LiFePO₄ batteries, operating at 52-56V), meeting daily needs. During winter blizzards, the system prioritizes essential loads, with heating relying entirely on a wood stove.
Power strategy: Use a mini-split AC when needed; winter heating mainly from wood stove. When the wood stove goes out, they also use the mini-split. During long winter blizzards, basic power needs are fine, but heating relies entirely on the wood stove. Laundry requires sunny days.
Hot water: Solar water heater with much higher efficiency than PV water heaters, providing plenty of hot water 8 months a year. For the remaining 4 months, they add a propane water heater as auxiliary heat. In cold months, it uses about one 5-gallon propane tank per month.
User 2:
Located in a mixed forest area of Northern California at 2,000 ft elevation (~610 m) on 10 acres. Mediterranean-to-mountain transition climate with dry summers and concentrated winter rain (about 3 weeks of continuous rain annually). The system is designed for seasonal light fluctuations. They have a 2,000 sq ft main house + attached workshop and garage, fully permitted.
Solar panels: 8 kW
Energy storage: 40 kWh lithium battery bank, 48V system, plus a 6 kW diesel generator backup (used about 3 weeks per year for extreme weather).
Water supply: 300-ft deep well with 240V submersible pump, powered directly from the main energy storage, with manageable daily power consumption.
Hot water: Propane tankless water heater provides consistent hot water without a storage tank, suitable for intermittent high-demand scenarios.
Heating/Cooling: Heat pump system covering AC and basic heating (main energy path); rear-vented propane stove as low-temperature emergency supplement.
User 3:
Located in northern Michigan (typical northern forest climate), humid continental with severe winter cold (extreme lows down to -40°F/-40°C) and mild summers. The system design specifically avoids low-temperature risks. They have a 1,160 sq ft (108 sq m) single-story cabin with loft and open ceiling design for natural heat circulation and even distribution.
Ten years ago, they were quoted $20,000-$25,000 for grid connection. This year, the quote rose to $40,000, so they decided to remain off-grid.
Solar panels: 1.2 kW solar system running stably for 15 years; orientation and tilt not specified but suitable for mid-latitude light conditions from March to November.
Energy storage: 4 x 400Ah AGM lead-acid batteries (48V system), replaced in 2023; chosen for low-temperature performance (operates down to -40°F), suited to northern climate.
Water supply: 220V deep well pump, powered by PV/battery system, runs only during the March-November usage period.
Hot water: Piezo-ignition propane water heater, requiring no external power for ignition, suitable for off-grid.
Heating: Wood stove (used early in the year and in November), using local wood resources; open ceiling design improves thermal efficiency.
Conclusion: From the three user cases above, we can see that all three use solar power as the core, with battery storage to ensure basic self-sufficiency. Based on their local environmental factors, they also have backup diesel generators, wood stoves, propane, and other supplementary energy sources.
Steps to Build an Off-Grid Cabin Solar System
Below, I’ll briefly introduce the steps to build an off-grid cabin solar system, divided into 4 steps.
Step 1: Calculate Daily Power Needs for Your Off-Grid Cabin
1. List all appliances you plan to use simultaneously, recording their wattage and daily usage hours.
2. Calculate total daily power consumption: Daily Consumption (Wh) = Appliance Power (W) × Quantity × Daily Usage Hours (h)
3. Determine peak power: Calculate the total wattage of appliances you might run simultaneously. This will determine your inverter size. Note that motor loads (pumps, refrigerators) may have startup power 3-7 times their rated power.
Example: Daily 2000Wh, peak sun 4.5h, efficiency 0.65. Total panel wattage = 2000 / (4.5×0.65) ≈ 684W. To have margin, choose 2 x 350W panels wired in series or parallel.
Step 2: Choose Appropriate Solar System Components
Solar Panels
Choose based on your situation: Monocrystalline (high efficiency 20%-23%, good for limited space, slightly higher cost) or Polycrystalline (good value, suitable for open areas, efficiency about 15%-18%). Based on your location, calculate: Total Solar Panel Wattage (W) = Daily Consumption (Wh) / (Peak Sun Hours × System Efficiency) to determine your panel’s power generation.
Battery Bank
Battery voltage is typically 12V, 24V, or 48V. Larger systems should use higher voltage to reduce current and losses. Calculate capacity: Battery Capacity (Ah) = (Daily Consumption (Wh) × Days of Autonomy) / (System Voltage (V) × Depth of Discharge × Inverter Efficiency).
For example, if your area typically has 2-3 cloudy/rainy days, critical loads may need 3-5 days. Depth of Discharge (DoD): Lead-acid typically 50%, Lithium (LiFePO₄) can be 80-90%. Inverter efficiency typically 0.85-0.93.
Example: Daily 2000Wh, 24V system, 3 cloudy days, lead-acid. Capacity = (2000×3) / (24×0.5×0.9) ≈ 555Ah. Could use 4 x 12V 100Ah batteries, two in series and two in parallel to make 24V 200Ah (adjust as needed).
Charge Controller
Recommend MPPT controller. It’s 10-30% more efficient than PWM, especially in low temperatures or cloudy conditions. Current calculation: Controller Rated Current (A) = Solar Panel Total Power (W) / System Voltage (V) × Safety Factor (1.25)
Example: Panel total power 700W, system voltage 24V. Current = 700/24 × 1.25 ≈ 36.5A. Choose a 24V/40A MPPT controller. Ensure the controller’s max PV input voltage (Voc) is well above the array’s open-circuit voltage in extreme low temperatures.
Inverter
Must choose a pure sine wave inverter. It works with all appliances, no noise, won’t damage motors. Modified sine wave inverters only work with resistive loads like incandescent bulbs. Rated power should exceed the total wattage of simultaneously running appliances, with 20-30% margin. For motor loads, choose an inverter whose peak power can cover the startup surge.
Step 3: Install Solar System Components
Physical Installation
1. Solar panels facing true south (Northern Hemisphere), tilt angle ≈ local latitude. Ensure no shading, secure firmly for wind resistance.
2. Controller, batteries, inverter should be installed indoors in a cool, dry, ventilated area. Lead-acid batteries must be ventilated as they release hydrogen gas during charging.
Electrical Connections
1. Connect battery bank to controller: First connect batteries to controller “BATTERY” terminal, the controller will power on.
2. Connect solar panels to controller: Connect panel array to controller “PV” terminal. Ensure correct polarity. If sunny, cover panels or work on a cloudy day.
3. Connect inverter to batteries: Inverter input wires connect directly to battery bank, with a DC fuse or circuit breaker in between. Do not connect to controller’s load terminals.
4. Connect loads: Small DC loads can connect to controller’s “LOAD” port. AC loads plug directly into inverter or through a distribution panel.
Protection and Wiring
1. Overcurrent protection: Install appropriate DC circuit breakers or fuses between batteries and inverter, and between solar panels and controller.
2. Wire gauge: For high current, use sufficiently thick pure copper cable to reduce voltage drop and heat. Search “DC wire gauge chart” or consult an electrician.
3. Grounding: The entire system (panel frames, controller, inverter case, battery negative) must be reliably grounded for lightning and shock protection.
Step 4: Solar Equipment Safety and Maintenance
1. No over-discharge: Lead-acid batteries below 10.8V (12V system), lithium batteries with proper low-voltage cutoff will severely shorten lifespan. Rely on controller’s low-voltage protection.
2. Temperature management: Battery capacity is affected by temperature; reserve more capacity for low temperatures. Ensure equipment heat dissipation in summer.
3. Regular inspection: Clean panel dust, check all terminals for looseness, corrosion, or heating.
4. Lead-acid battery watering: If using flooded lead-acid batteries, check regularly and add distilled water.
5. Safety first: DC arcing is dangerous. Wear safety glasses, remove metal jewelry. If unfamiliar with electrical work, hire a qualified electrician.
Note: While New York State has passed the SUNNY Act, check local regulations (e.g., NY’s SUNNY Act requires systems ≤1.2 kW). Learn more by clicking on solar energy storage products to see Chinese factory manufacturers’ products.
Off-Grid Cabin FAQs
Is off-grid living legal in the US?
It’s allowed in some areas, but depends on local regulations. For example, California allows it but requires building and health standards compliance; Oregon restricts rainwater collection. Before building, check local zoning laws and obtain permits!
Do I need 12V or 24V power systems for off-grid living?
Depends on appliance needs. 12V suits small devices (lights, phone charging), 24V can handle larger loads. If on a budget, start with 12V and upgrade gradually. My experience: 24V is more efficient and better long-term.
What’s the best foundation for an off-grid cabin?
1. There’s no “best,” only “most suitable.”
2. Rocky ground: Concrete raft foundation.
3. Swampy ground: Pile foundation + raised floor.
4. Permafrost areas: Use thermal breaks to prevent frost heave.
Advice: Find local builders (e.g., experts in the Ozarks region) – they understand local geology better.
I’ve seen too many folks rush into the deep woods with romantic fantasies, only to retreat in disarray due to lack of preparation. Off-grid living isn’t about escaping reality—it’s about making more conscious choices in how we live. What off-grid living has truly taught me isn’t how to disconnect from society, but how to deeply connect with myself and with nature. I hope my experiences can help you embark on your own extraordinary journey.
Do you have any better suggestions or ideas regarding this article, “How to Power Your Off-Grid Cabin”? Feel free to share your experiences in the comments.